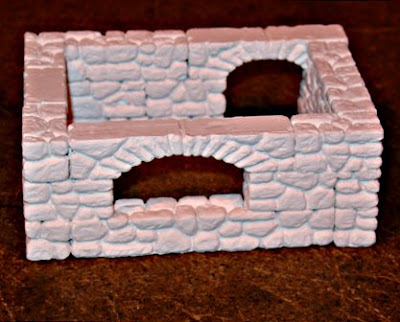
Last night I made my very first HIRST ARTS building with blocks that I had cast.... I say I cast, what I actually mean is I, with the aid of my 2 young sons cast. As a result of Ryan doing most of the mixing, stirring and pouring, we had a few variable results. Some blocks came out perfect, others had a few air-bubbles, and some were riddled with air-bubbles... BUT, all were more than adequate for use.
The moulds used were the Fieldstone sets. This is an excellent beginners set, as due to it's very nature a few minor imperfections, and even a few major ones can easily be worked around. (If we had been using some of the other moulds with smoother surfaces we could well have suffered with a few less pleasing blocks.)
Believe it or not, we even had some more than reasonable results by filling empty moulds with the soft plaster scraped from the first mould, although one of these did have more bubbles.
In just one evening, we had 4 sets of curved blocks, 2 or 3 sets of straight ones and a handful of fieldstone accessories / ruins.
Once dry, the boys had great fun piling them up and making baricades and small castles. It really didn't matter if any blocks got damaged (not that they did), because if any did get lost or damaged, we just had to re-cast a few more! The boys were free to experiment with their buildings however they wanted to.
Last night, I decided to stick a few blocks together to make a permanent structure. Only a small one to start with to get to grips with the way it works. It's a single roomed dwarf dwelling about 4" x 3" simple straight walls with a flat roof and spiral steps on the outside to reach the walled roof area which serves as a lookout point.
I used a very cheap version of No Nails bought from the Pound Shop which works fine for this sort of project. and within an hour it was designed, put in place and glued. (Photographs Below.)


1 comment:
The best cure for bubbles in Hirst Arts molds is to spritz them with a diluted mixture of Jet Dry and water before pouring the plaster. It really does make a difference.
Post a Comment